

What you'll need:
3 different-colored nail polish
1 pencil/anything that can be used to dot
1 base coat
1 top coat
1 paper
1 scissors
1 hair dryer (optional)

Apply your base coat (optional). Let it dry. Then apply your desired nail polish color. In mine, I used Miss Beauty's sanding fruit extract nail polish in blue.

Once the first nail polish color is dry, apply the second nail color. This next nail color will serve as the color of your cat. You can use white, orange, brown or any color you'd like your cat to be. Make a curved tip on your nail using the nail polish.
The cat's head would look more prominent if your nails are pointy-shaped.


On a scratch paper, cut a small triangle. That will serve as the cat's ear. If you have the right tools or if you think your skills are good enough for you to make the cat ears, you can skip this step and the next.

Place the paper on your nails. The cut part should be where you want to place the ears. Keep it in place, then apply nail polish.
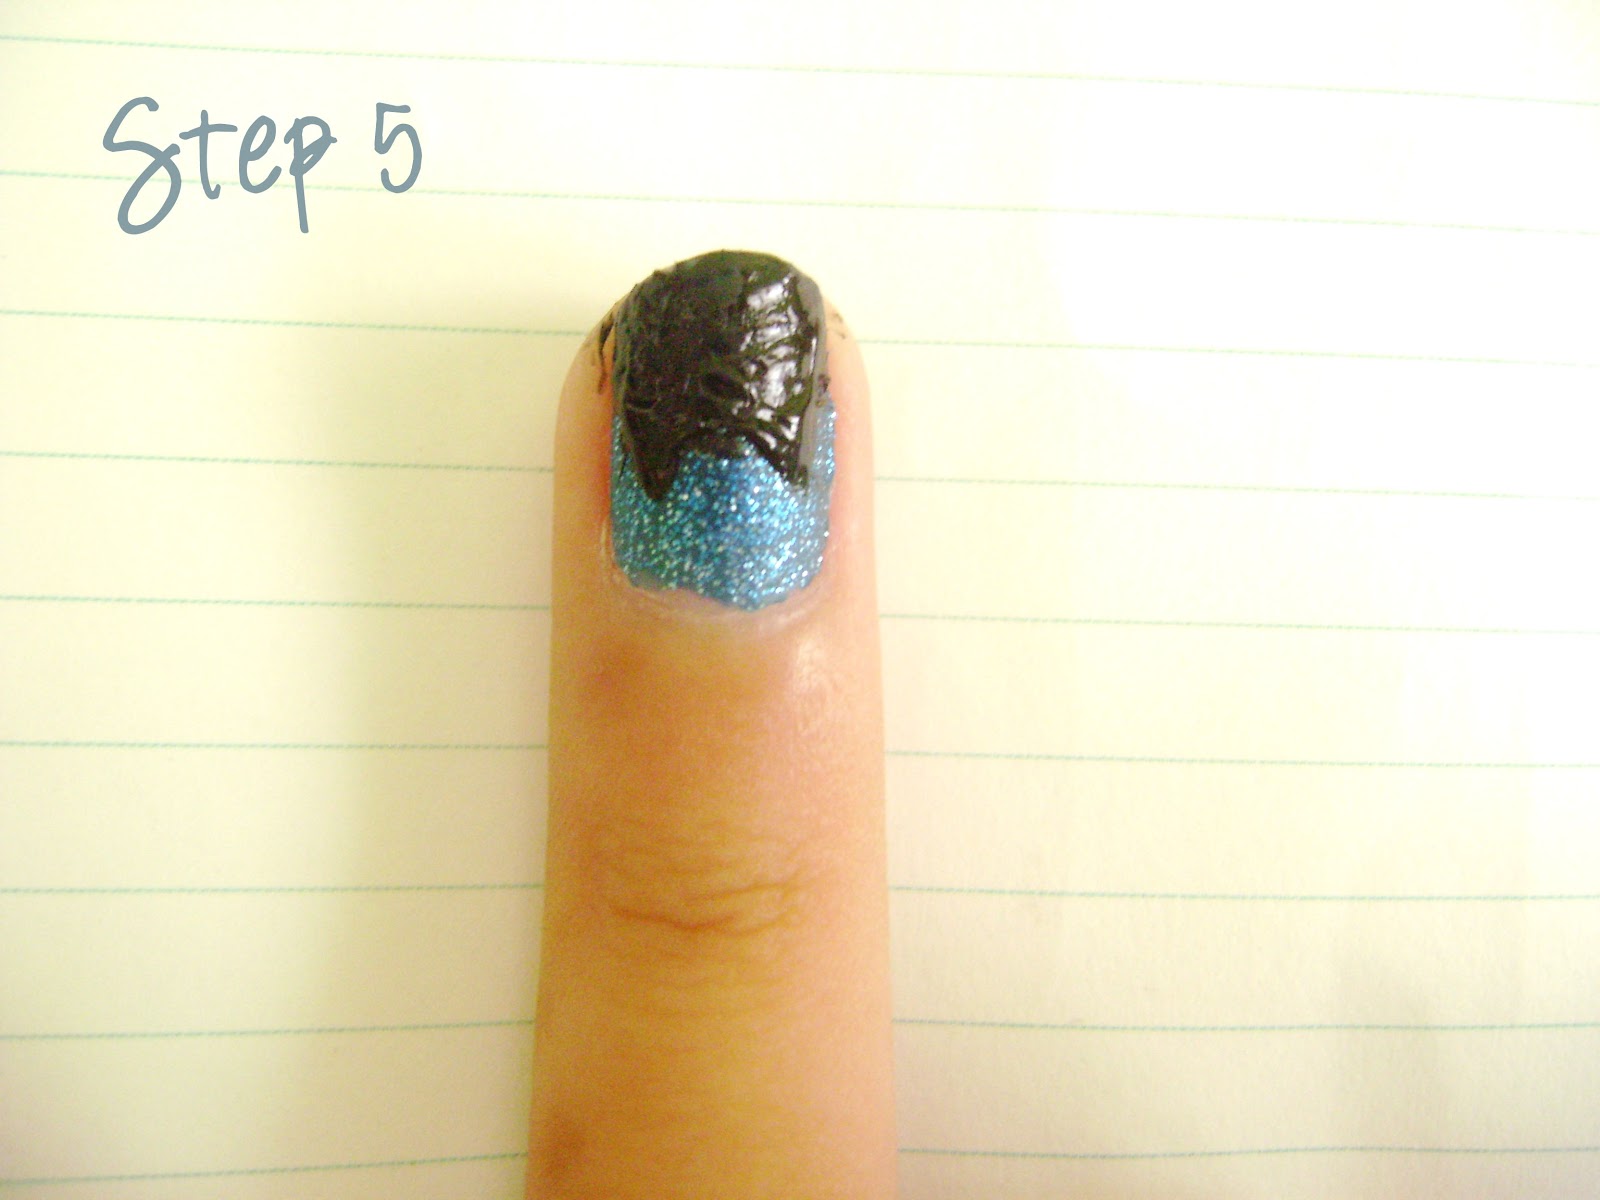
Do the same with the other ear.
Pardon my cat's face... the nail polish I was using was a bit dry hence the outcome.

Take your dotting object (in my case, a pencil). Dip the tip on the third nail polish color, then dot the eye.

Let it dry. Apply top coat. Then let it dry again. You could use a fan/blower to hurry up the process. I did mine in 5 minutes (using blower).
NOTE: Let it dry first before adding a new nail polish or else it would mix/smudge.
I love the result! :D
ReplyDeleteThanks! Have you tried it? :)
DeleteYes! :D You can see here -> http://naokomizuto.blogspot.com.es/2013_01_01_archive.html
Delete